NMI Salesforce integration challenges
- Integrating NMI and Salesforce manually requires building and maintaining custom code. This can add up to dependency on a Salesforce expert.
- Technical issues, such as network errors or loose integration, can cause data loss, interruptions, and incorrect data records.
- Your data is scattered across different places. Payment details stay in NMI, while customer and sales information stay in Salesforce. This makes it difficult to gain a centralized view of everything altogether.
- Finance and sales teams have to manually map and compare different reports to match payment details with sales. Switching back and forth between Salesforce and the NMI dashboard. This could be time-consuming and prone to errors.
With ChargeOn, all these challenges are eliminated!
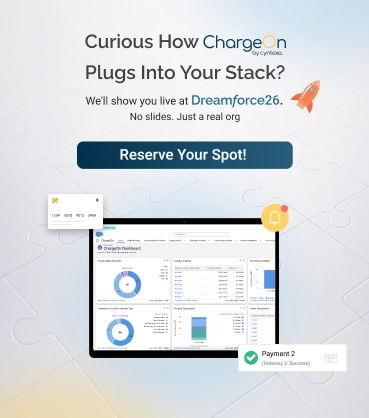
How does ChargeOn resolve Salesforce NMI integration challenges?
ChargeOn is a 100% Salesforce native payment processor and orchestration platform. It offers a centralized view of all your payments in Salesforce, bringing data from the NMI payment gateway and Salesforce together.
ChargeOn provides prebuilt flows for one-time and recurring payments, reminders, retries, and payment links. Additionally, it offers tokenization, PCI DSS-compliant processing, and secure data flows with a failover backup mechanism.
This is not it! There is more to explore!
Step-by-step NMI payment gateway integration with Salesforce using ChargeOn
This guide helps you in:
- Assigning appropriate permissions to relevant users
- Configure and set up ChargeOn
Note: Screenshots and details may differ based on your gateway version.
Access to an active NMI gateway account
Technical steps start here:
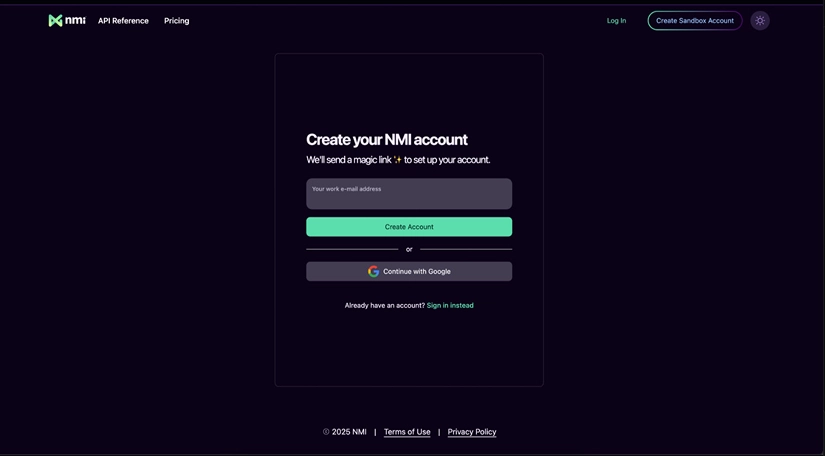
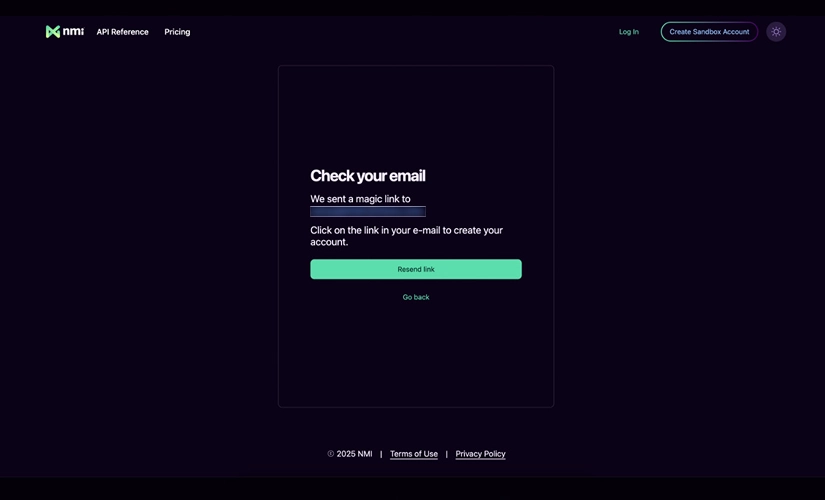
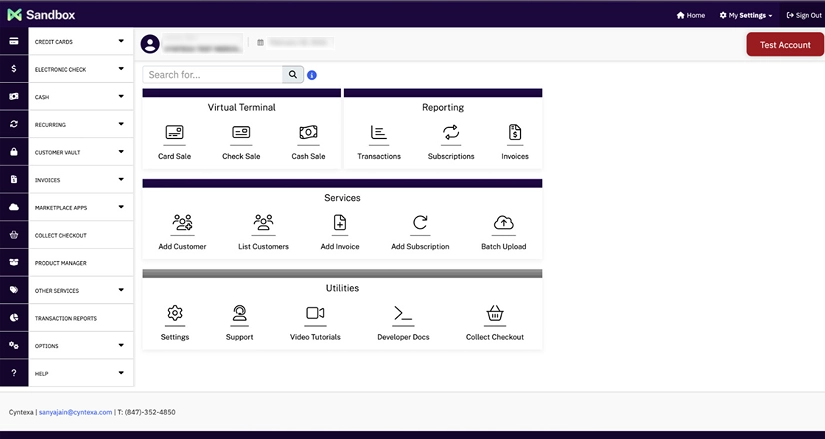
Step 1. Log in to the Portal
- Go to the NMI Link
- A dashboard will open
- Locate and click on the Portable Sandbox
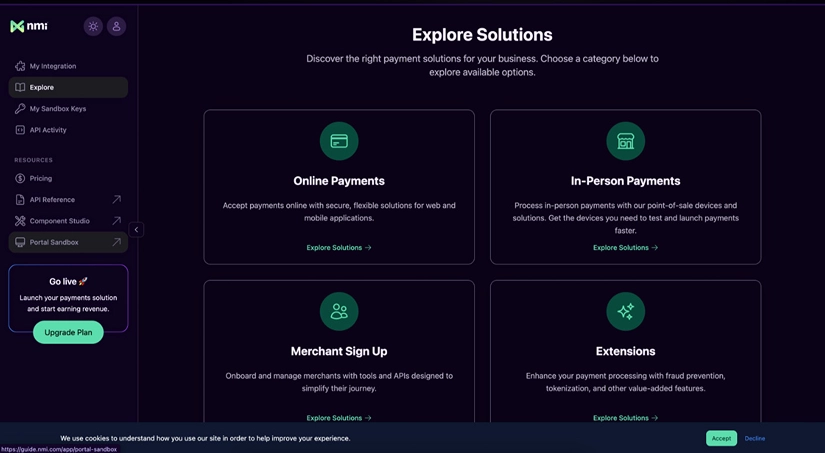
- From the new window, verify the account with the authentication code
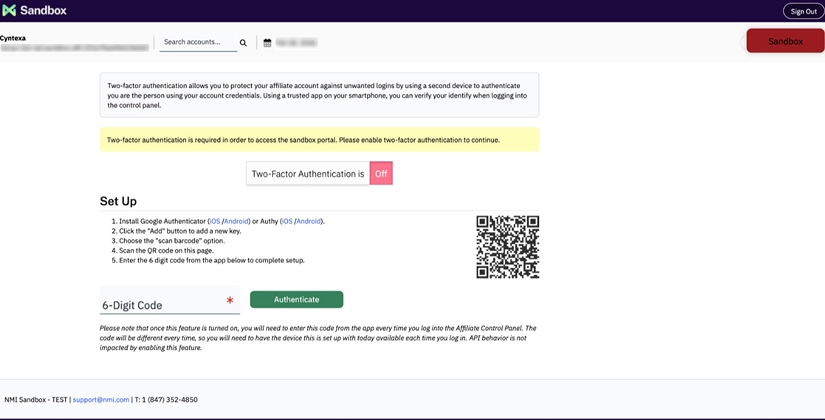
- Your verification will be confirmed
Step 2. Open the Account Settings of the merchant account
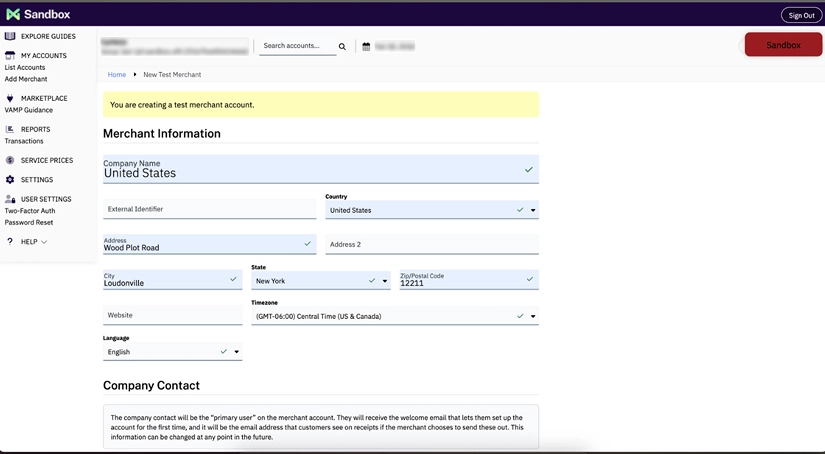
- Create a test merchant account
- Fill in the asked details
- Click on Add Merchant
- Under List Accounts, your test account will be visible
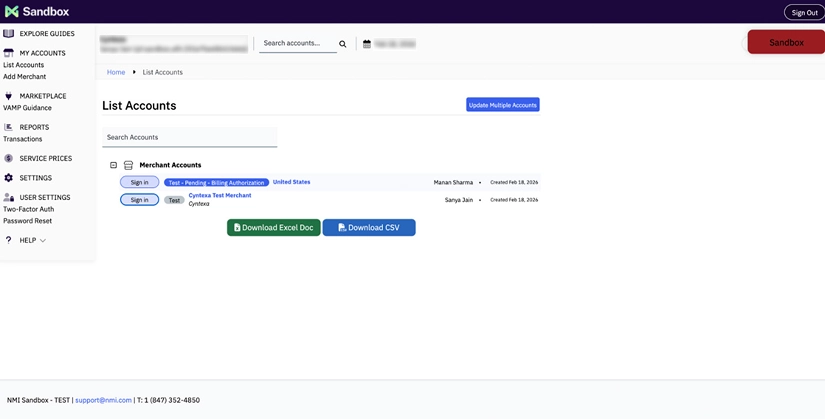
- Log in to your relevant merchant account by clicking on Sign in
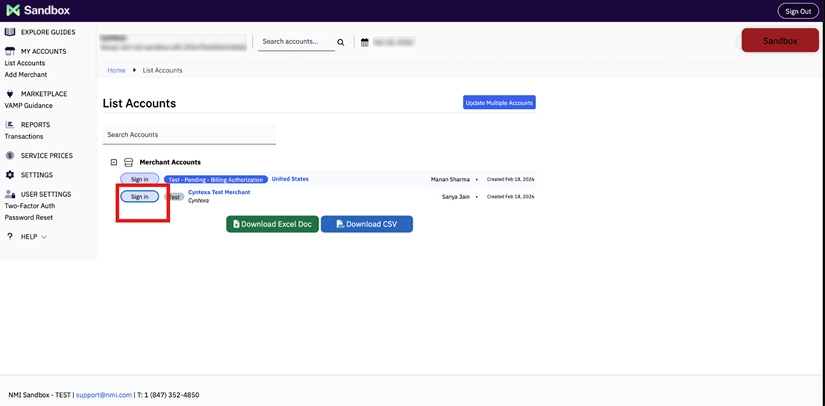
- Post signing in, the user will be able to access their personalized dashboard/merchant account
- They can perform different activities through this dashboard, such as reporting, adding a customer, listing a customer, adding an invoice, and more
Step 3. Get the Secret Key
- Click on the Settings option
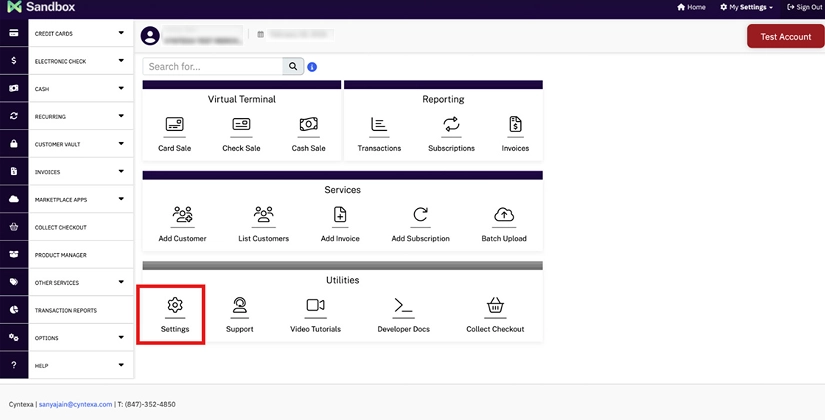
- Click on the Security Keys
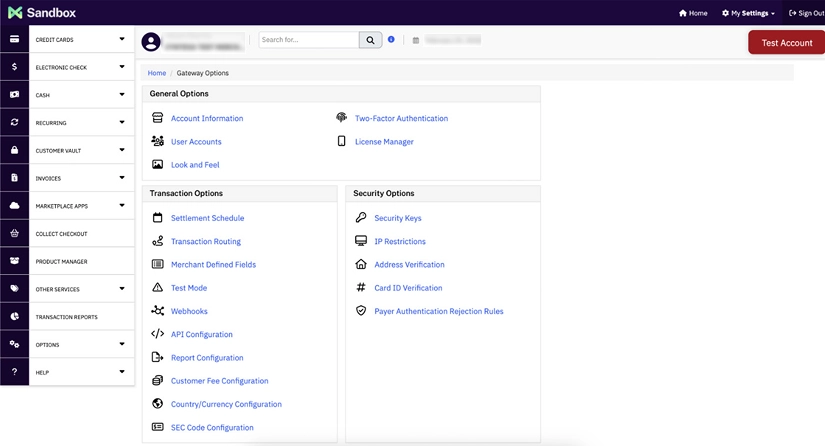
- User gets the Security key
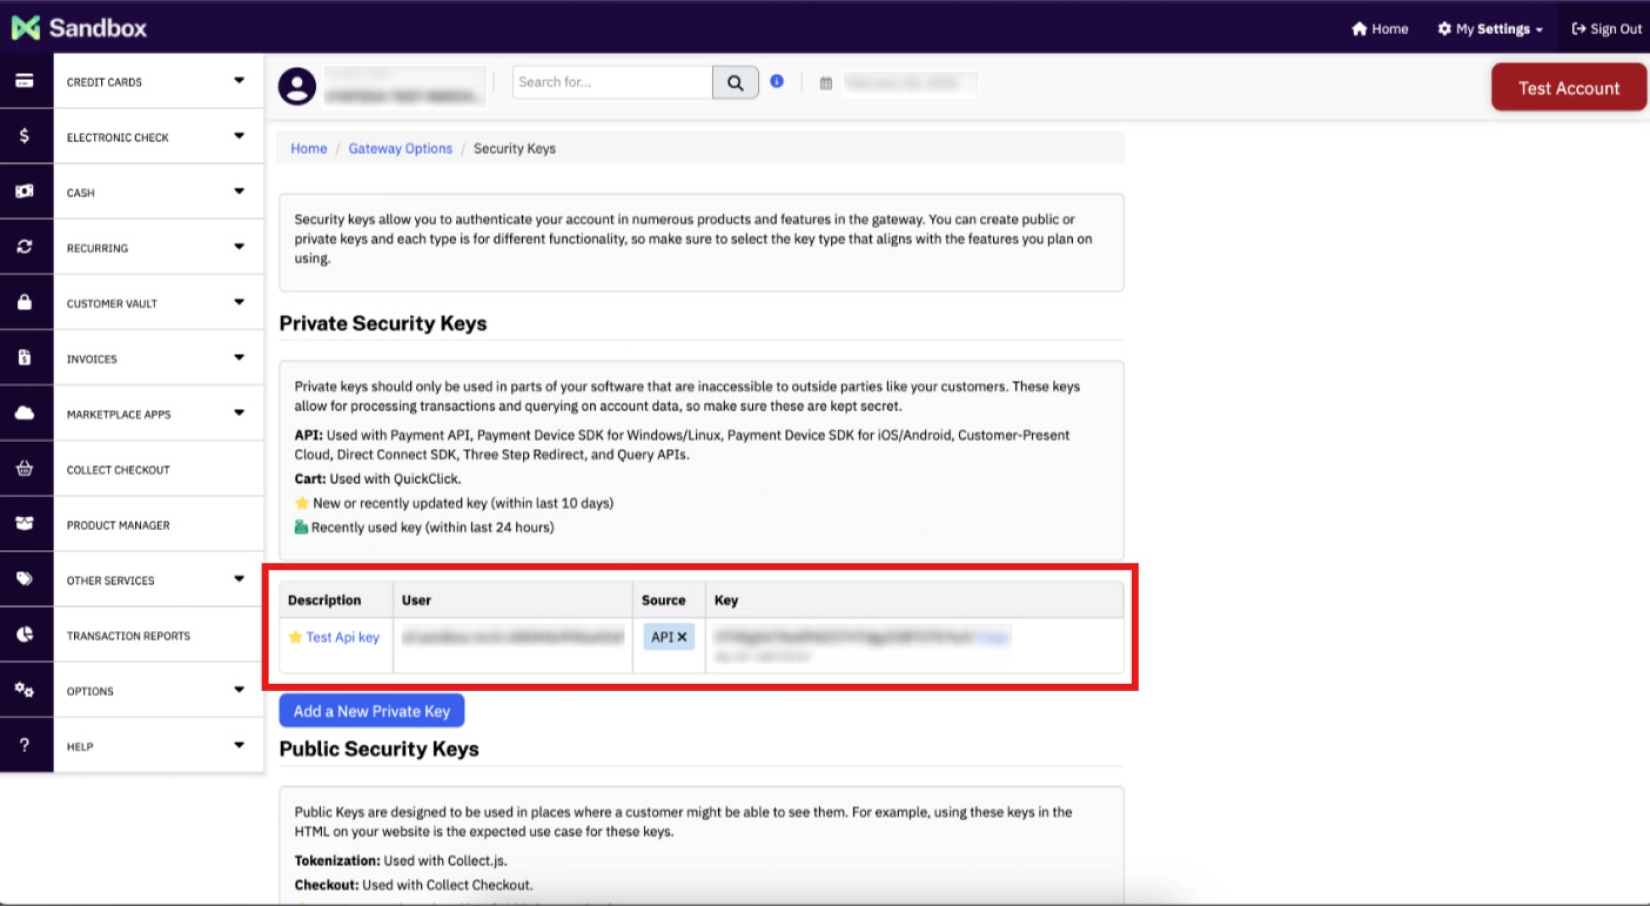
Step 4. Save and Share Securely
- By now, you have obtained the Secret Key
Step 5. Test Cards for NMI
- Go to NMI Test Cards to test your cards and
Create your NMI payment gateway record in Salesforce
- Click on the App Launcher (9-dot icon)
- Search for ChargeOn
- Click to open the ChargeOn application that you have installed
- From the ChargeOn app navigation bar, open the Payment Gateway tab.
- Click New to create a new Payment Gateway record.

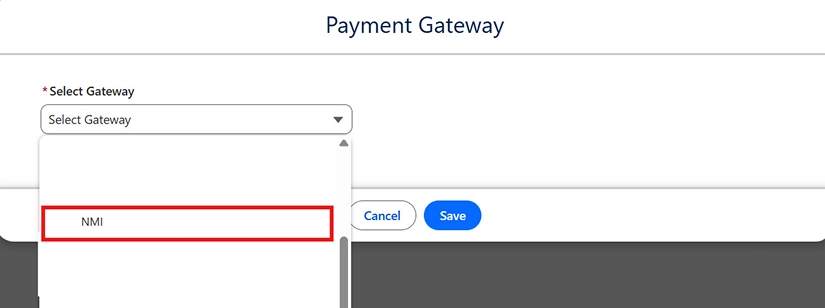
- In Select Gateway, choose NMI from the dropdown.
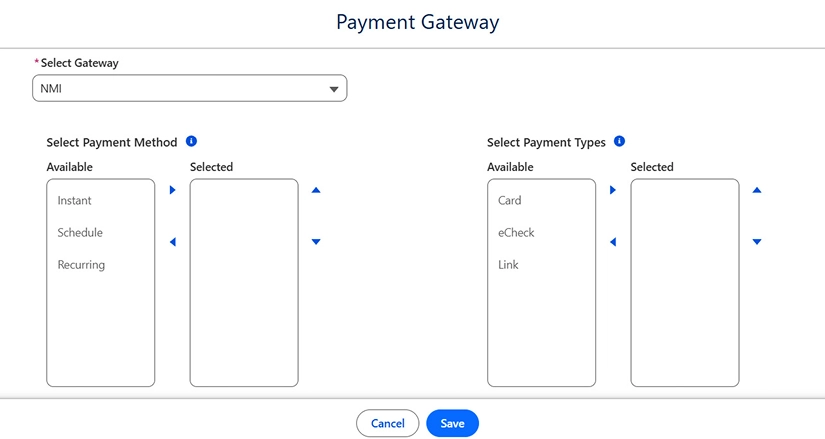
- Under Select Payment Method, move the following options from Available to Selected:
- Instant
- Schedule
- Recurring
These define how payments can be processed using this gateway.
- Under Select Payment Types, move the following options from Available to Selected:
- Card
- E-check
- Link
This enables payment links for NMI.
- Fill in the required fields as follows:
- Payment Gateway Name
- Gateway
- Default Currency: USD
- The supported currencies: The supported currencies by NMI are determined by the payment processor that is currently in use. However, ChargeOn supports many currencies
- Base URI:
- Sandbox: https://sandbox.nmi.com/api/transact.php
- Production: https://secure.nmi.com/api/transact.php
- Minimum Charge: $1
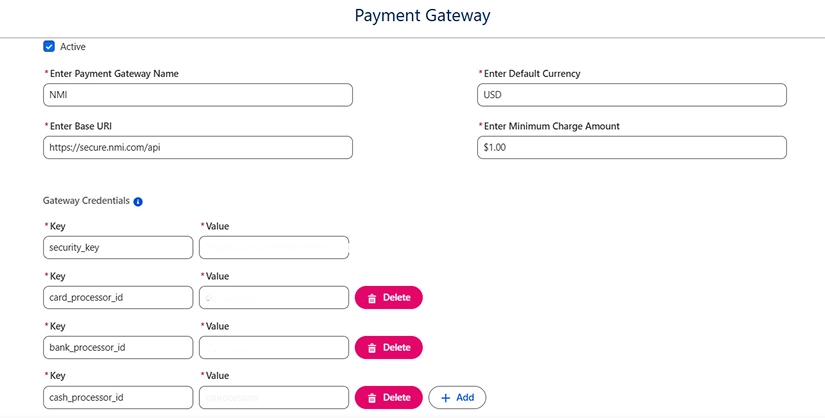
- Use the api test URL for sandbox/testing.
- Replace with the production URL when configuring live payments.
Step 7: Add gateway credentials (refer to the previous image)
- In the Gateway Credentials section, add the following key-value pairs:
- Credential
- Key: Security_key
- Value: {your security key}
- Key: Card_processor_id
- Valur: {your card processor id}
- Key: Bank_processor_id
- Value : {your bank processor id}
- Key : Cash_processor_id
- Value: {your cash processor}
- Credential
Step 8: Review all details carefully and click Save
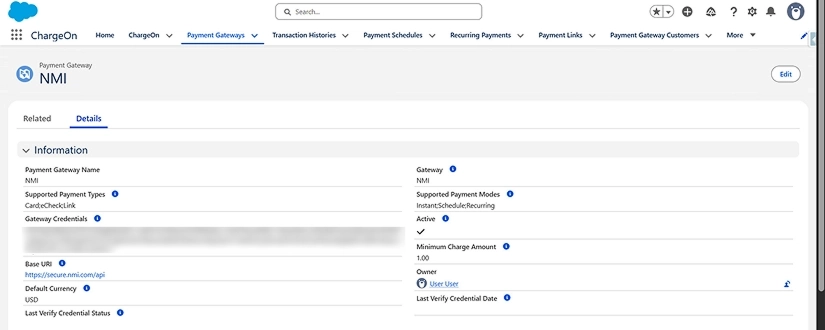
The NMI payment gateway is now configured and ready for use in ChargeOn.
Test your transactions in a Salesforce Sandbox
You can test your integration in multiple ways.
We are sharing one of the simplest ways to test the same using NMI payments.
- Selects the payment gateway to start the payment process
- Once the gateway is chosen, select the payment method from Card, E-check, or Payment Link
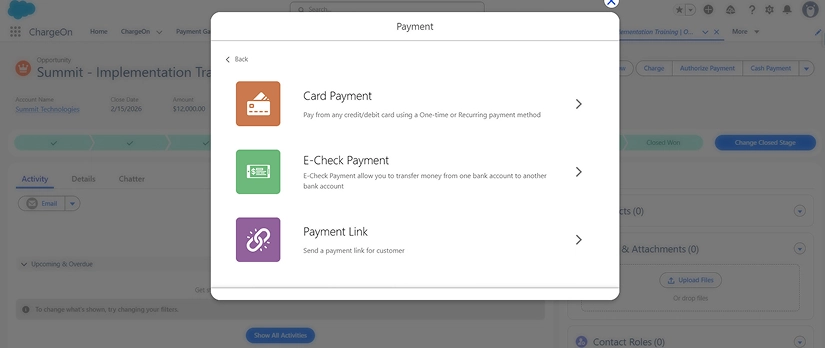
- Choose the payment mode: instant or scheduled payment
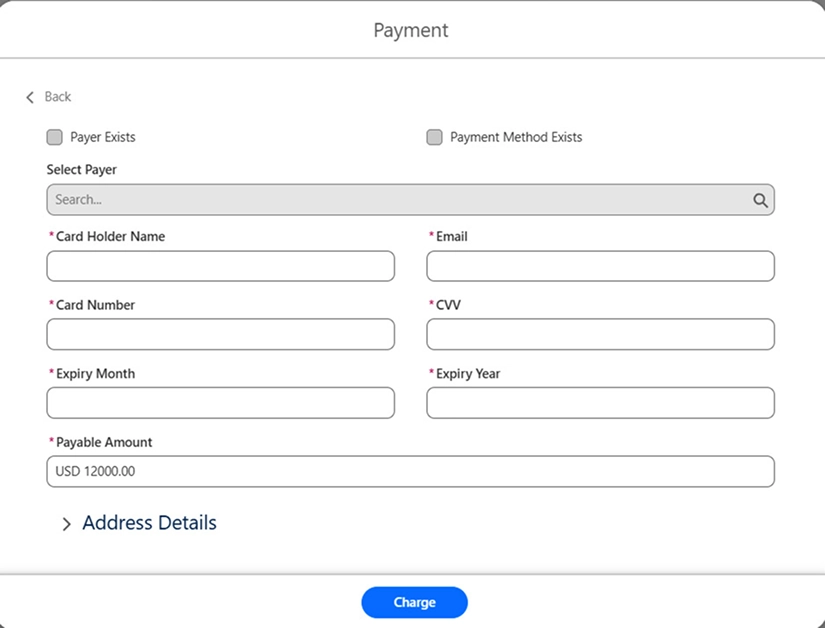
- Enter basic personal details, such as Payee Name, Email, and Payable Amount
- Click the Charge button to submit the payment
Prepare to go live in production
After the testing is completed in the Sandbox, the configuration can be migrated to the production environment:
- Log in to the NMI payment gateway account
- Open Settings under Options
- Click on Test Mode, Under the ‘Transactions Options ’
- Add these credentials to ChargeOn, and now your data is ready for the live environment
You can also refer to the supporting documentation
With this, your Salesforce NMI integration is successful using ChargeOn
In case you encounter any challenges or errors during this setup, please reach out to our ChargeOn experts, who will assist you.
Refer to our Salesforce Multi-Gateway Setup Guide for integrating multiple payment gateways and optimizing your Salesforce payment integration. This eliminates the dependency on a single vendor.
Apart from NMI, ChargeOn supports other widely used global payment gateways, including: