


TOC
Table of Contents
Sales and finance teams often track payments across spreadsheets, gateway dashboards, and separate Salesforce records. Reconciling revenue data across three systems slows monthly reporting and reduces productivity. This challenge is common among growing Salesforce teams, as most gateways do not offer a native integration with a CRM.
They are built to process transactions, not to keep Salesforce records updated. However, connecting payment gateways to Salesforce can solve this by syncing transaction data directly into Salesforce records. Teams gain real-time visibility into payment status without switching tools.
This Salesforce payment gateway setup guide walks through the available integration methods. Each method comes with its own step-by-step Salesforce payment integration, technical requirements, and tradeoffs.
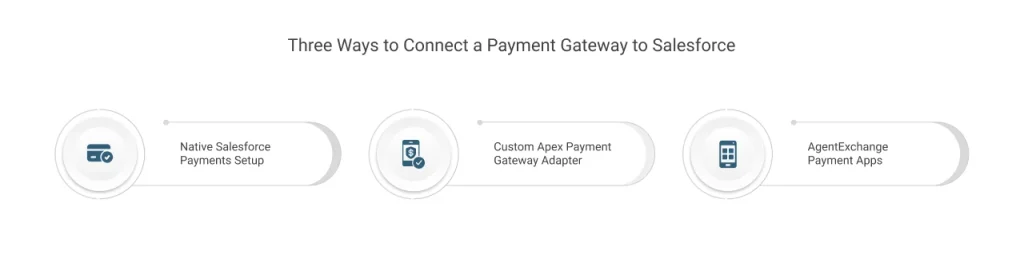
Three ways to connect a payment gateway to Salesforce
Salesforce offers various methods for integrating third-party payment gateways, each tailored to different team needs.
Based on technical resources, we will discuss how to integrate third-party payment gateways in Salesforce
Native Salesforce payments setup
Salesforce Payments is a native package available through AgentExchange (AppExchange). It connects Salesforce directly to major providers without custom code and works closely with Commerce Cloud and Order Management.
| Step | What Happens |
|---|---|
| 1. Install the package | Add Salesforce Payments from AgentExchange (AppExchange) if not already provisioned |
| 2. Open Payments Setup | Salesforce walks admins through linking a merchant account inside the Payments Setup app |
| 3. Connect a provider | Link Stripe, PayPal, or Apple Pay accounts to the merchant account |
| 4. Enable in checkout | Turn on Salesforce Payments in Store Settings, under the Checkout tab |
| 5. Handle unsupported gateways | Use the Alternate Provider tile to select a third-party adapter if the required gateway isn’t listed |
| 6. Test and publish | Run test transactions in a sandbox, then publish the store |
This route suits teams already using a supported provider inside Commerce Cloud. Teams needing a wider set of gateways move to the next method.
Custom Apex payment gateway adapter
Teams with development resources can build a custom adapter using Salesforce’s Apex connector framework. This route offers full control but requires ongoing engineering support.
| Step | What Happens |
|---|---|
| 1. Review reference classes | Start from Salesforce’s Core Payments Reference Gateway Integration Adapters on GitHub |
| 2. Build the adapter class | Implement required methods for authorization, capture, and refund logic |
| 3. Register the gateway | Create a Payment Gateway Provider record pointing to the custom adapter |
| 4. Map data fields | Align gateway response fields with Salesforce payment and order objects |
| 5. Test each operation | Run sandbox transactions covering authorize, capture, refund, and error handling |
| 6. Maintain over time | Update the adapter as gateway APIs or Salesforce packages change |
Building a custom adapter requires dedicated developer time, not just for initial setup but for ongoing maintenance as gateway APIs and Salesforce packages change. Adding each new gateway means repeating this build from scratch. For most businesses, the engineering cost outweighs the flexibility gained.
AgentExchange payment apps
A faster alternative exists for teams that want gateway flexibility without the custom build. Payment apps available directly on AgentExchange (AppExchange) connect Salesforce to a broader set of leading gateways like Stripe, Authorize.net, PayPal, and more. It comes with setup handled via guided configuration screens and 24/7 tech support rather than code.
ChargeOn is one such application. It functions as a payment processing and orchestration platform, integrating multiple gateways into a single Salesforce-native interface. Instead of building and maintaining a separate adapter for every gateway, teams configure each connection through ChargeOn’s setup screens.
| Step | What Happens |
|---|---|
| 1. Install ChargeOn | Go to the ChargeOn AppExchange listing and install the package into your Salesforce org |
| 2. Assign permissions | Grant relevant users access through ChargeOn’s permission sets |
| 3. Open the ChargeOn app | Use the App Launcher and search for ChargeOn to open it |
| 4. Complete initial setup | Follow ChargeOn’s guided configuration for business rules and object mapping |
| 5. Confirm installation | Verify the app appears in your org’s installed packages, ready for gateway configuration |
This removes the ongoing engineering dependency that comes with the custom route. Switching or adding a gateway later doesn’t require rebuilding the integration from scratch.
The next section explains how to connect your preferred gateway once ChargeOn is installed.
How do I add my preferred gateway to ChargeOn?
Once ChargeOn is installed, connecting external payment processors to Salesforce happens entirely inside the app. No custom code or external middleware is required.
Before you start: confirm you have an active account with your chosen gateway, along with its API credentials.
| Step | What Happens |
|---|---|
| 1. Open the ChargeOn app | Use the App Launcher and search for ChargeOn |
| 2. Go to Payment Gateway | Open the Payment Gateway tab and click New |
| 3. Select your gateway | Choose your preferred provider from the dropdown list |
| 4. Choose payment methods | Select Instant, Scheduled, or Recurring, based on what your gateway supports |
| 5. Choose payment types | Select the payment types relevant to your business, such as card, bank/ACH, or payment link |
| 6. Enter gateway details | Add the gateway name, default currency, and base URI (sandbox URL for testing, production URL for live use) |
| 7. Add credentials | Enter the API key and secret provided by your gateway |
| 8. Save and test | Review the record, save it, then run test transactions in a sandbox before going live |
Once testing is complete, set up remote site settings for the gateway’s API domain, then move credentials to the live environment to go active.
This walkthrough covers the general flow across gateways. Steps can vary according to different providers, particularly around credential fields and default currency options. Our Salesforce multi-gateway setup guide covers this in more depth, including how to configure and manage multiple gateways within a single ChargeOn setup.
Which integration method is right for you?
Choosing between these three paths comes down to a few practical questions.
- Does your checkout already run entirely inside Commerce Cloud, using a supported provider?
Native Salesforce Payments may cover your needs without additional setup.
- Do you have dedicated developer resources for ongoing maintenance, not just initial build?
A custom Apex adapter offers full control, but only pays off when that resource commitment is sustainable long-term.
- Do you need to support multiple gateways, or expect to switch gateways as your business grows?
AgentExchange payment apps handle this without a rebuild each time, since new gateways are added through configuration, not custom code.
- Do you want gateway flexibility without carrying the engineering overhead?
This is where AgentExchange apps close the gap between native limitations and custom complexity.
For most Salesforce teams, the native route works only within a narrow set of conditions, and the custom route demands resources few teams can sustain indefinitely. AgentExchange payment apps sit in the middle, offering configuration-based setup with room to add or change gateways later. ChargeOn fits this category, consolidating gateway management into one Salesforce-native interface without requiring a rebuild each time a gateway changes.
The right choice ultimately depends on how much flexibility your payment setup needs today, and how much it’s likely to need next year.