
Agentforce Setup Guide
By the end of this guide your team can take payments, issue refunds and look up transactions by asking, inside Salesforce.
Who does this: a Salesforce administrator.
How long: about an hour.
Complete the prerequisites first
Everything in the Agentforce prerequisite guide must be done, including the four policy decisions in its Part 4. You will enter those decisions here.
You need the Agent Script from the ChargeOn team
The agent is created from a script the ChargeOn team provides. Ask for it before you start. Do not modify it unless the team tells you to.
What You Will Do
- Create the agent from the script
- Check the subagents and actions arrived
- Set the payment policy
- Set the confirmation phrases
- Activate the agent
- Give the agent its permissions
- Take a payment by asking
Part 1: Create the Agent from the Script
- Open Agentforce Studio from the App Launcher.
-
Go to Agents and open More options beside New Agent.

-
Choose New from Script to create the agent from Agent Script.
- Paste in the script the ChargeOn team gave you.
- Click Create Agent.
What you should see: Salesforce takes you into Agent Builder, with the agent's structure already built out.
Part 2: Check the Subagents and Actions Arrived
The script configures the agent's subagents and their actions automatically. Before going further, check they are there.
You should find subagents covering:
- Taking payments: Instant Payment, Schedule Payment, Installment Plan, Subscription and payment links
- Authorising, capturing and voiding
- Refunds
- Looking up transactions and payment methods
Each carries its own actions, and each includes a permission check.
The exact list depends on your script version
The ChargeOn team updates the script over time, so the number of subagents and their names may not match a colleague's org or an older screenshot. What matters is that the four areas above are all represented. If one is missing, stop and ask the ChargeOn team before continuing.
What you should see: subagents covering all four areas, each with actions listed beneath it.
Part 3: Set the Payment Policy
This is where the ceilings you decided in the prerequisite guide are entered. Do this before the agent goes live, not after.
- Go to Setup → Custom Metadata Types.
- Open Agent Payment Policy and click Manage Records → New.
- Fill in:
| Field | What to enter |
|---|---|
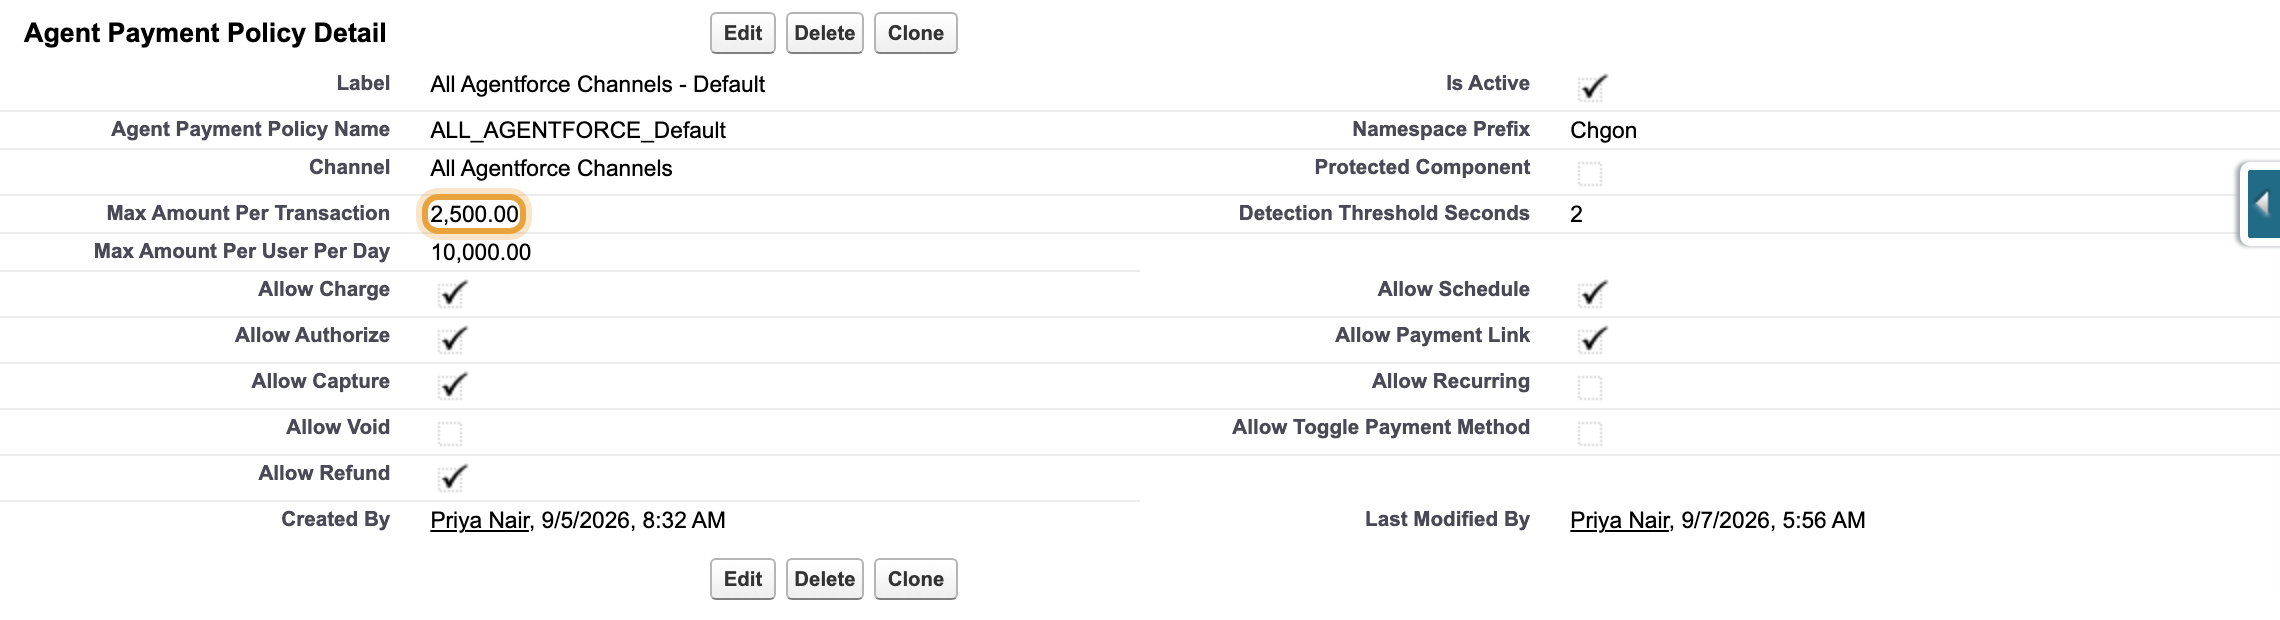
| Max Amount Per Transaction | The largest single amount the agent may take |
| Max Amount Per User Per Day | The most one user may take in a day |
| Detection Threshold Seconds | The window in which the agent must handle a request |
| Allowed Operations | The operations the agent may perform |
- Click Save.
An operation must be permitted by both Allowed Operations and the user’s permission sets.
What you should see: a saved policy record with your ceilings on it.
Set spending ceilings before taking payments
The active policy includes a timing setting. Enter Max Amount Per Transaction and Max Amount Per User Per Day before your team takes payments with the agent. An active policy with these fields blank leaves spending uncapped.
Part 4: Set the Confirmation Phrases
The agent will not complete a payment until the person confirms it in words. You decide which words count.
- Still in Custom Metadata Types, open Confirmation Affirmation Phrase.
- Click Manage Records → New.
-
Add the phrases your team will use, for example Confirm, Yes, Confirmed, Proceed, Go ahead.
-
Click Save.
What you should see: your phrases saved and listed.

Configure confirmation phrases before going live
Save the phrases your team uses so the agent can recognise explicit approval before completing a payment.
Part 5: Activate the Agent
- In Agent Builder, click Save.
- Click Commit.
- Wait for the commit to finish: Activate appears only afterwards.
- Click Activate.
If you need another language, set it from the Language menu before activating.
What you should see: the agent showing as active.
Activate will not appear until you commit
If you cannot find the button, the commit has not finished.
Part 6: Give the Agent Its Permissions
The agent needs its own permissions, separate from the people using it.
- Go to Setup → Permission Sets.
- Open the ChargeOn Agent Core permission set and click Edit.
-
In the agent assignment section, add the ChargeOn agent you just created.
-
Click Save.
This one goes to the agent, not to a person
Assign Agent Core to the agent record itself so it can run the configured actions. Assign each person the operational permission sets appropriate to their role.
Separately, assign each user the ChargeOn permission sets appropriate to their role. Those control what each person can do through the agent.
What you should see: Agent Core assigned to the agent, and your test user holding the ChargeOn permission sets for the operations you want to test.
Part 7: Take a Payment by Asking
- Open the ChargeOn app.
- Click the agent icon.
- Ask it to take a payment, for example, take the first $2,125 installment of the $8,500 Summit - Q4 Expansion for Emily Ross using her saved payment method.
-
Follow its questions.
-
When it asks you to confirm, reply with one of your configured phrases.
-
Check Transaction History for the resulting transaction.
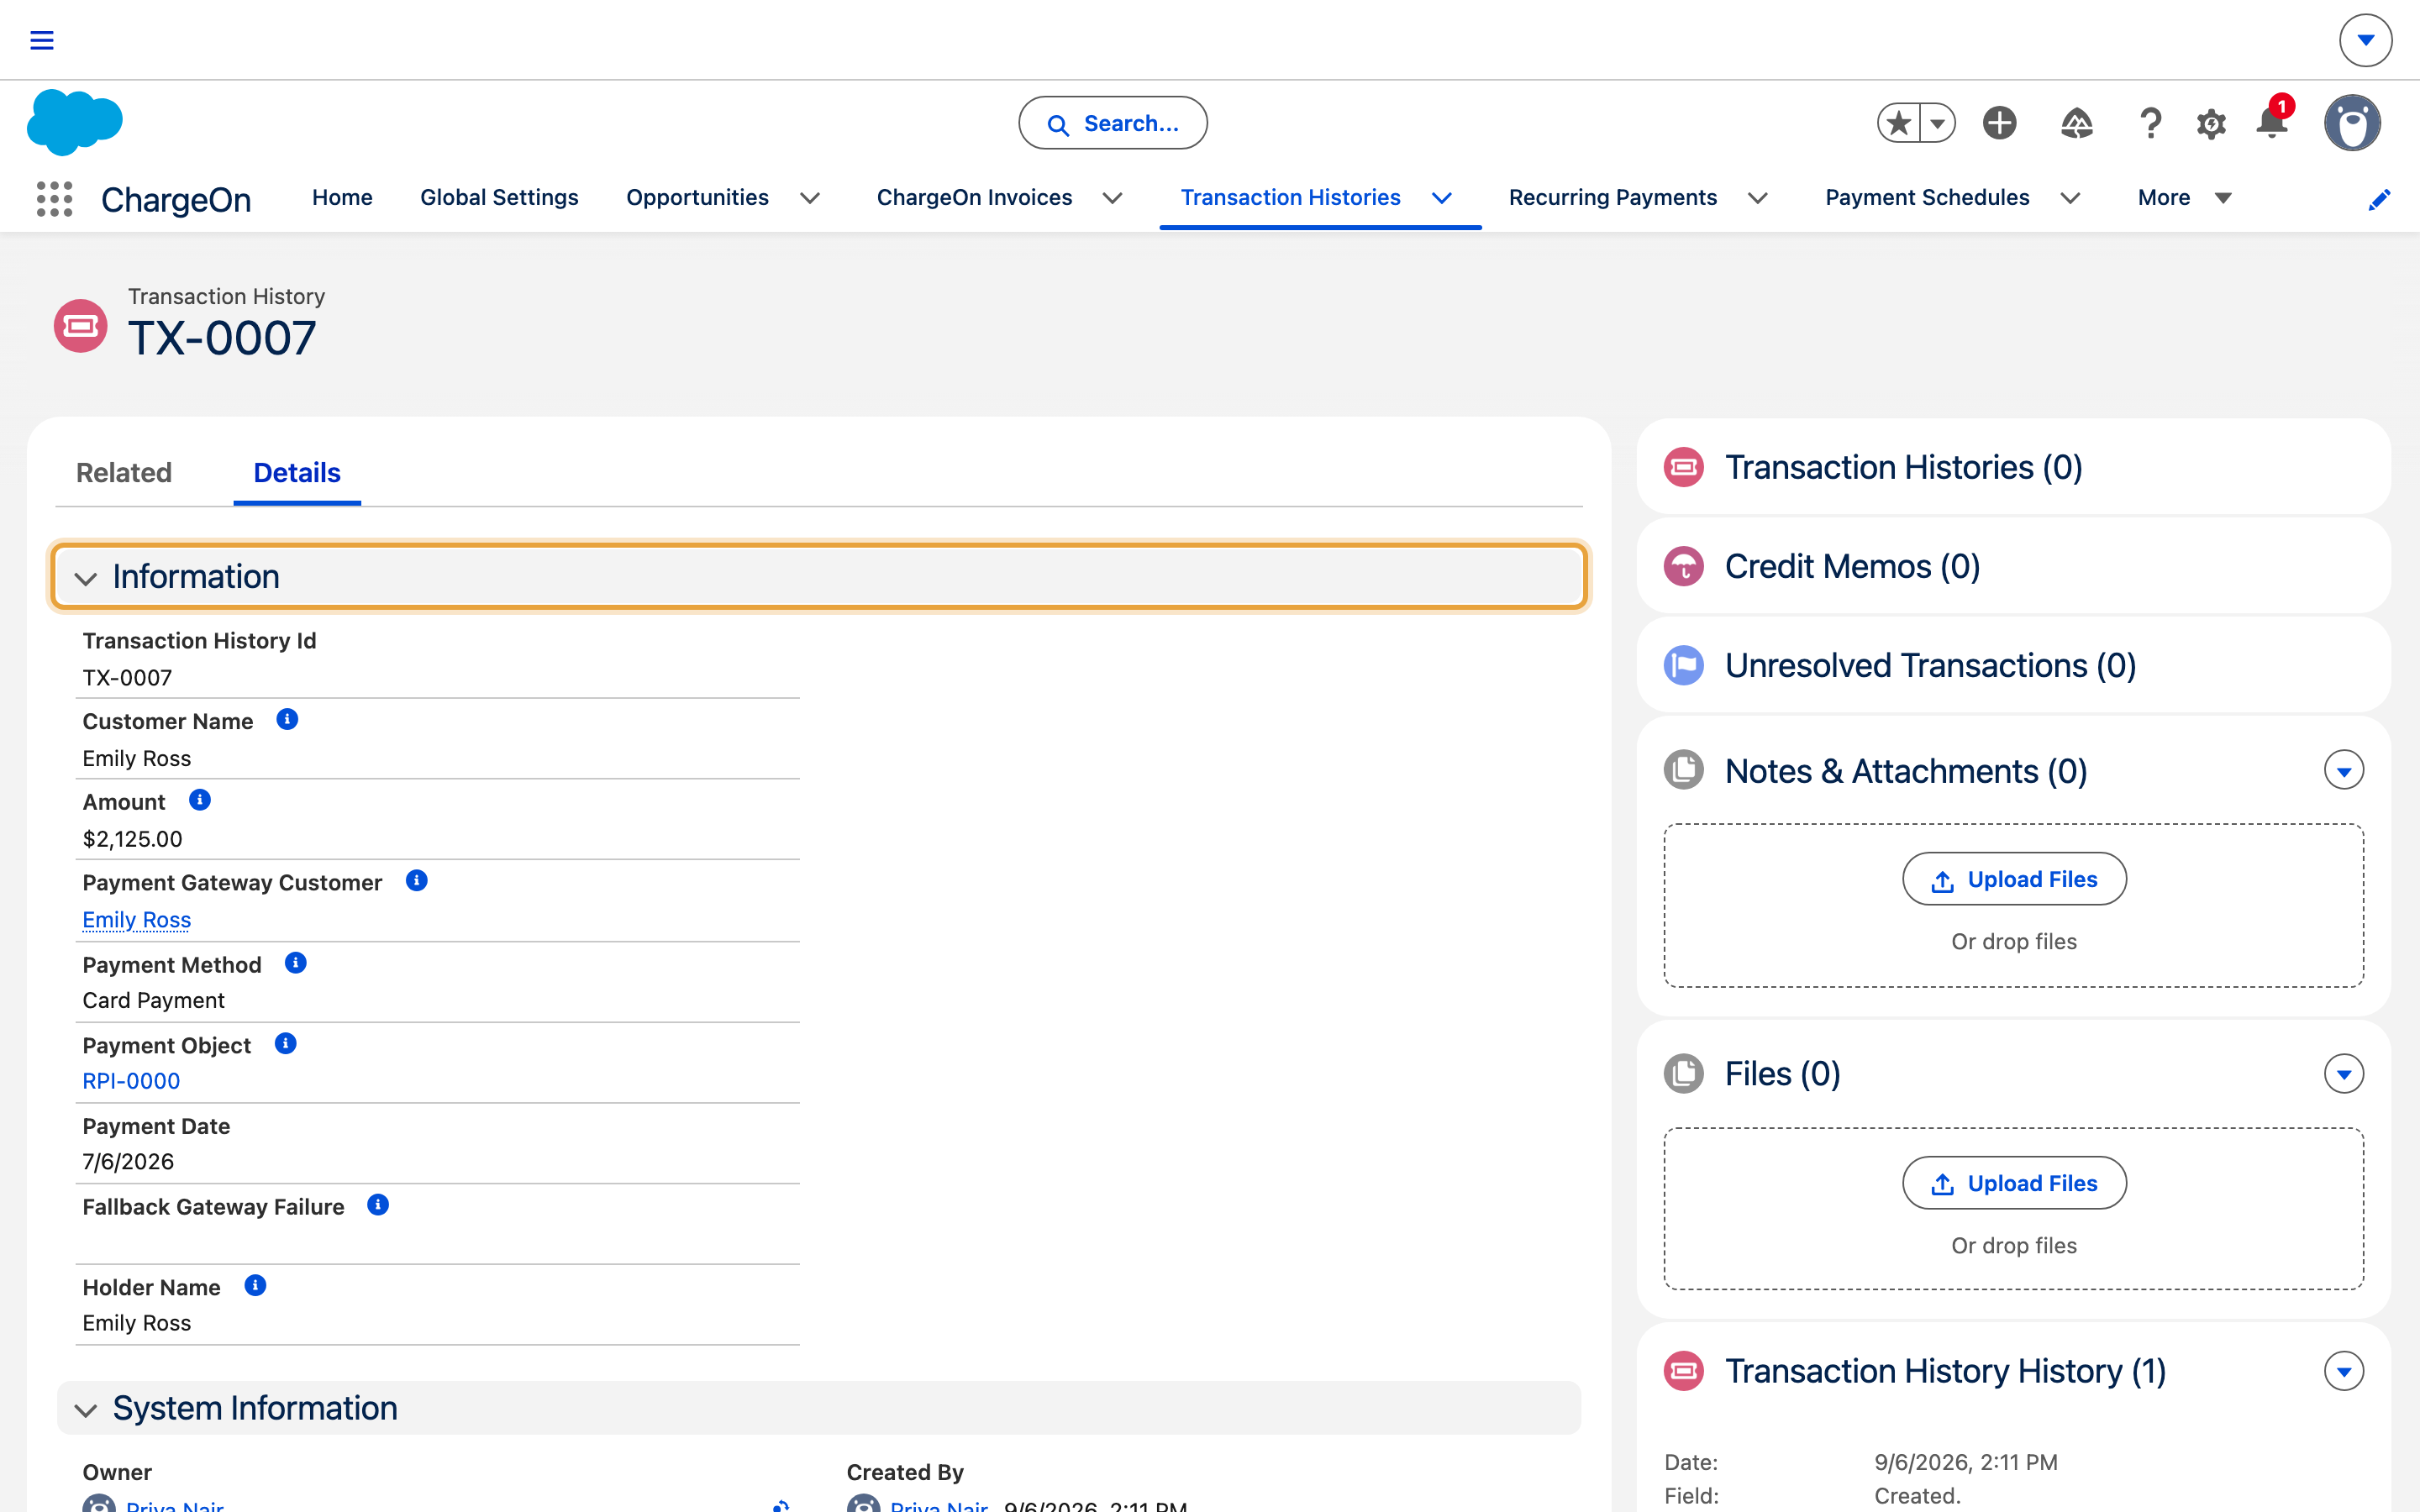
What you should see: a successful transaction, identical to one taken through the Charge button.
Your team can now ask the agent to:
- Take payments using Instant Payment, Schedule Payment, Installment Plan and Subscription
- Generate payment links
- Authorise, capture and void
- Issue refunds
- Look up transactions and payment methods
- Show everything about a customer in one view
Save payment methods before using the agent
Save the customer’s payment method through the payment form before asking the agent to charge it. Keep card details out of the conversation.
If Something Went Wrong
| Symptom | Likely cause | What to do |
|---|---|---|
| Activate does not appear | The commit has not finished | Part 5. Commit, wait, then look again |
| The agent says the user lacks permission | The user's ChargeOn permission sets do not cover that operation | Part 6. Permissions are per user and per operation |
| The agent refuses an amount | It exceeds a ceiling in your payment policy | Use a smaller amount, or raise the ceiling. A payment link for the same amount will be refused too |
| The agent asks to confirm and then does nothing | No confirmation phrases are configured, or the reply did not match one | Part 4. Add the phrase your team actually types |
| The agent cannot find a payment method | The customer has none saved for that gateway | Save a payment method through the Charge button first |
| The agent used the record you had open when you did not mean it to | The request referred to "this record" | Name the record explicitly instead |
| The agent will not change currency mid-conversation | Currency is fixed when the payment starts | Start again with the right currency set on the record |